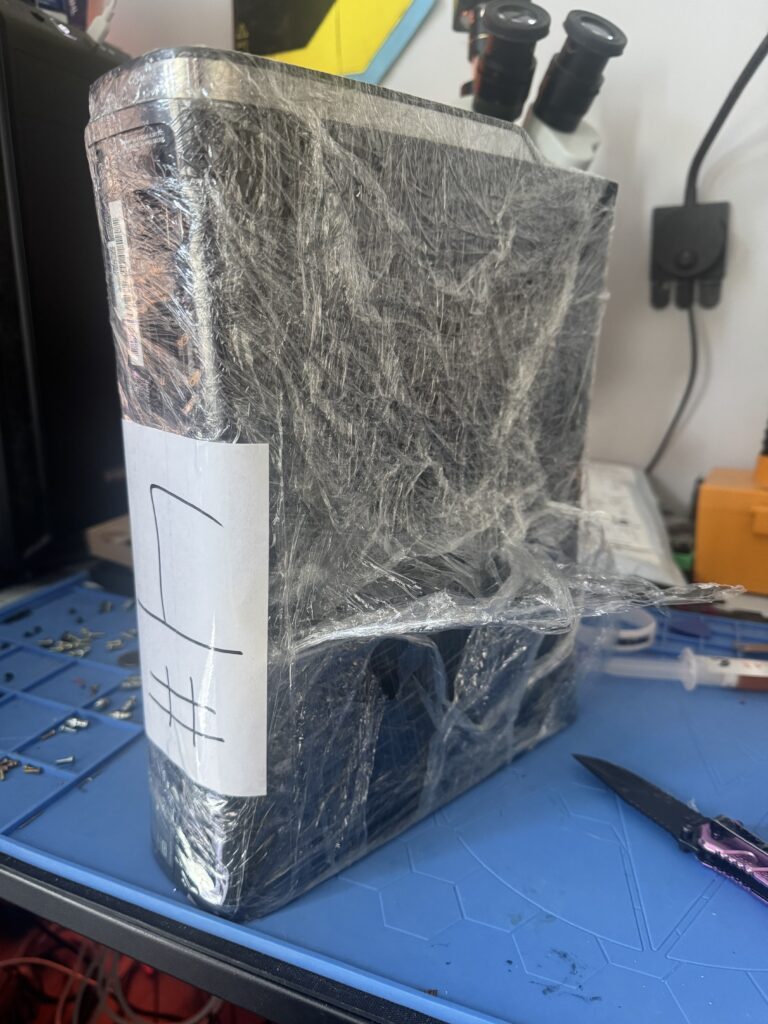
Hello! I’m not dead, despite many medical woes and life events and oh god. I’ve been wanting to mod a 360 for a while – SO many great games were made for it and I have many fond memories of my original one, waaaay back in the day. One particularly lucky sniper no-scope snapshot headshot in Gears springs to mind… anyway! After trawling around I found paydirt on eBay. It was a well-wrapped unit, and I *mean* well-wrapped:
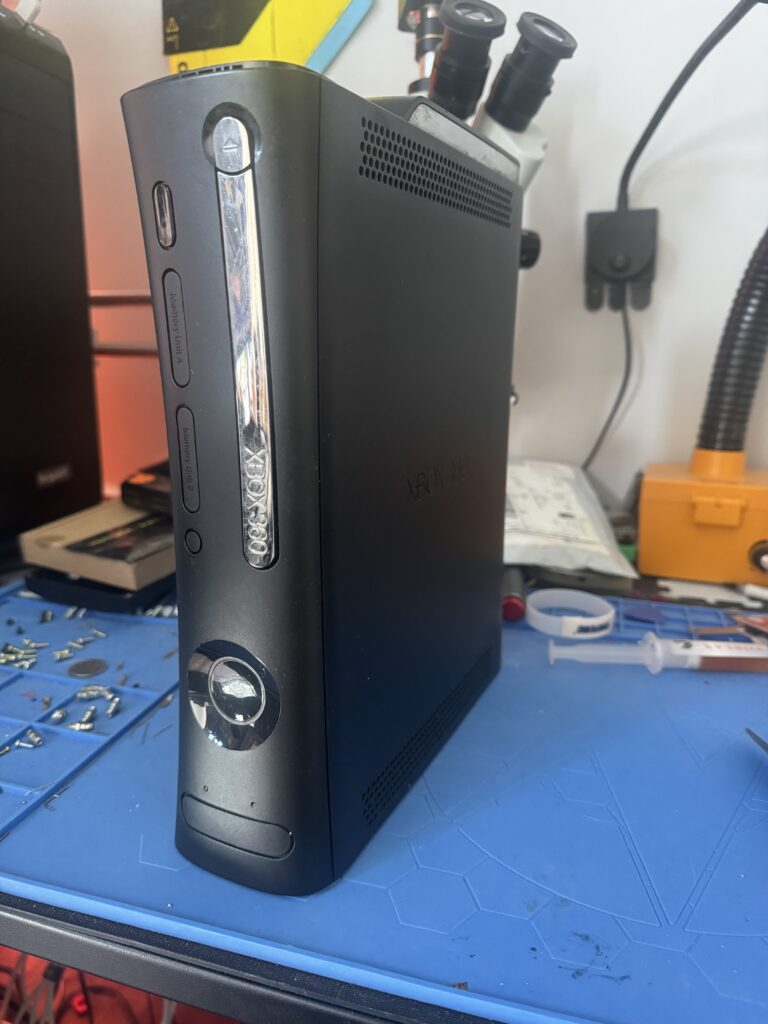
After some hacking away with that knife (thanks B!) a 360 in good condition revealed itself!
A quick power test shows it’s live and good to go! This procedure is pretty detailed, and consists of these steps:
- Crack open the 360
- Read the onboard NAND
- Flash part of the NAND (first 50 sectors?) to allow booting into Xell Reloaded
- Wire up a glitch chip (Matrix v3 in this case)
- Program the Matrix chip
- Create a custom NAND image using the console’s CPU key obtained from Xell
- Reflash the NAND
- Test booting up
I’d never done this before so there was a LOT of research and headscratching involved. Let’s start at the top, with opening up the 360.
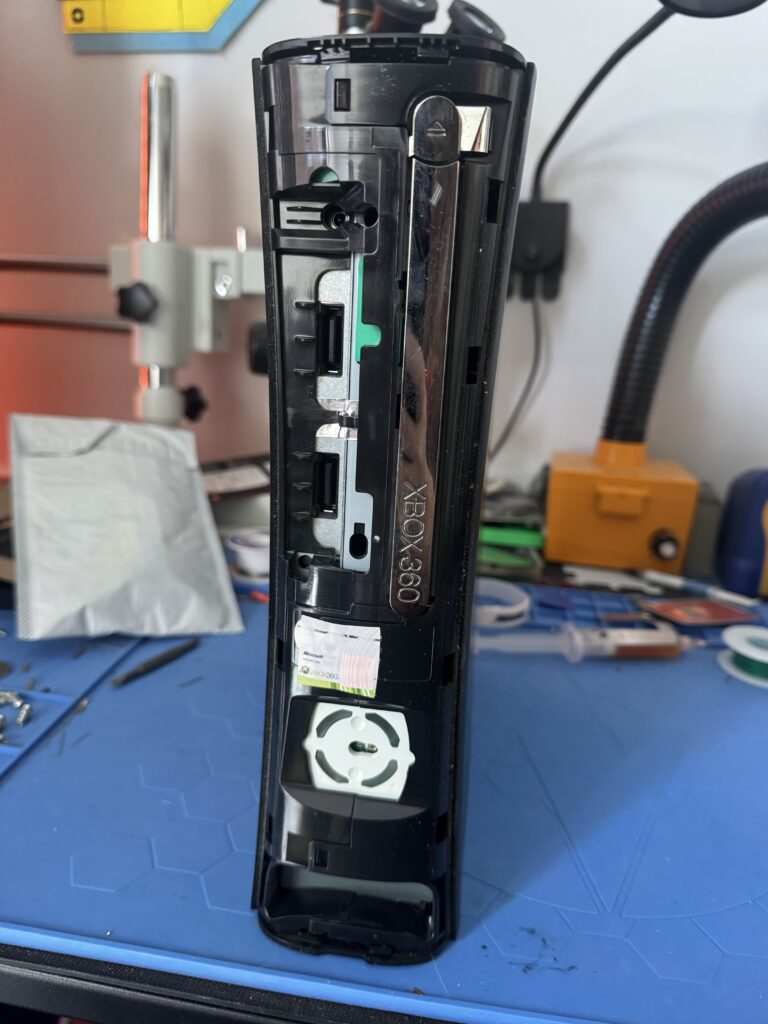
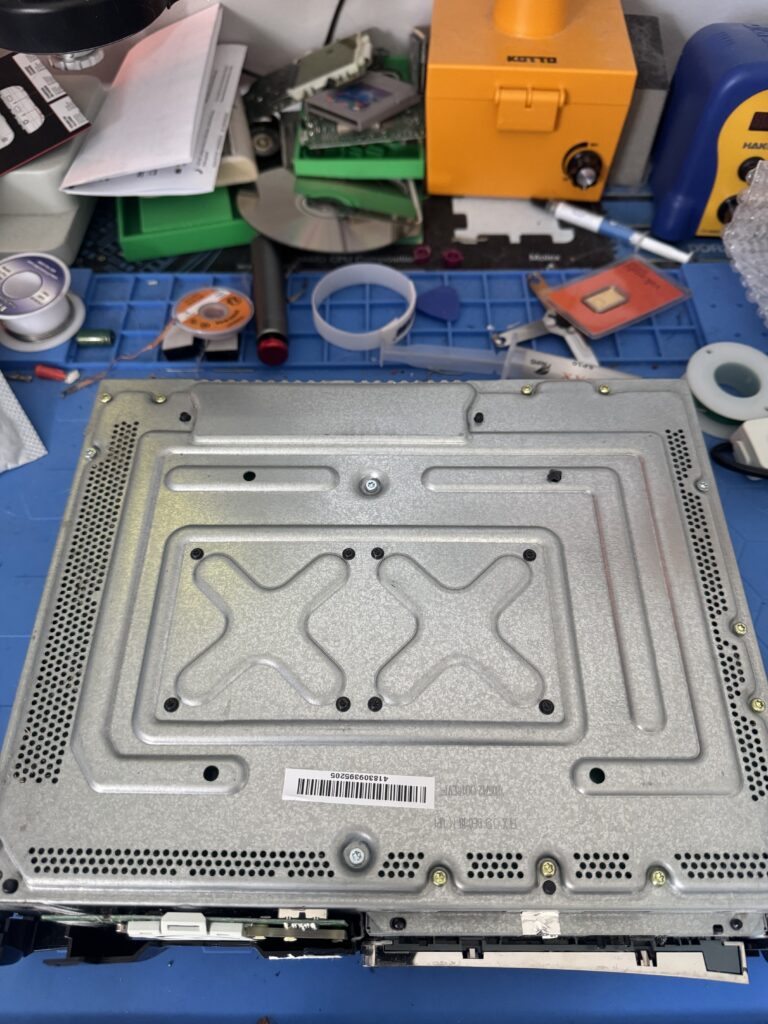
With the faceplate off and the hard drive removed, the top and bottom plastic grilles need to come off. This is a slightly tricky thing to do as you need to hunt down the latches holding them onto the main case, then gently pop them out. Rush it and they’re likely to break and then you’re stuffed. Once done you can see the metal shielding.

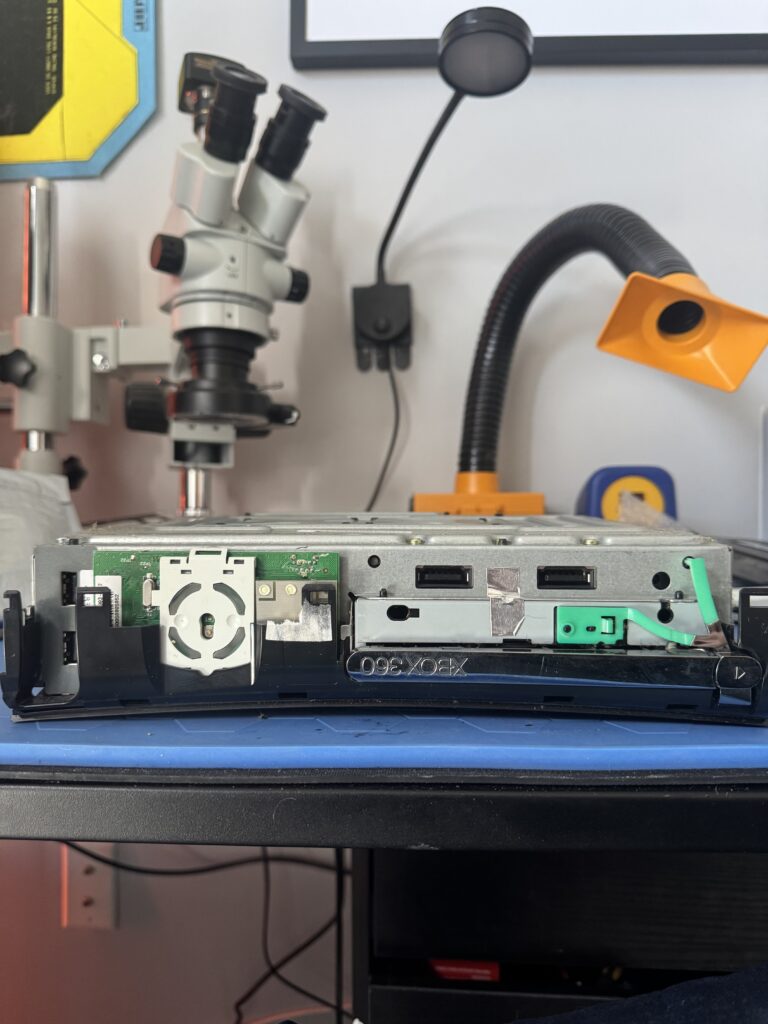
Next up, the main case of the console needs to be popped open and removed. The bottom half goes first.
The warranty sticker was destroyed on opening. Oh no. What a shame.
The eject button – the green, almost “Y” shaped bit of plastic on the right – is next to come out after some gentle prying from the casing, and the top half of the case follows. Some Torx screw removal later and we can get to the guts!
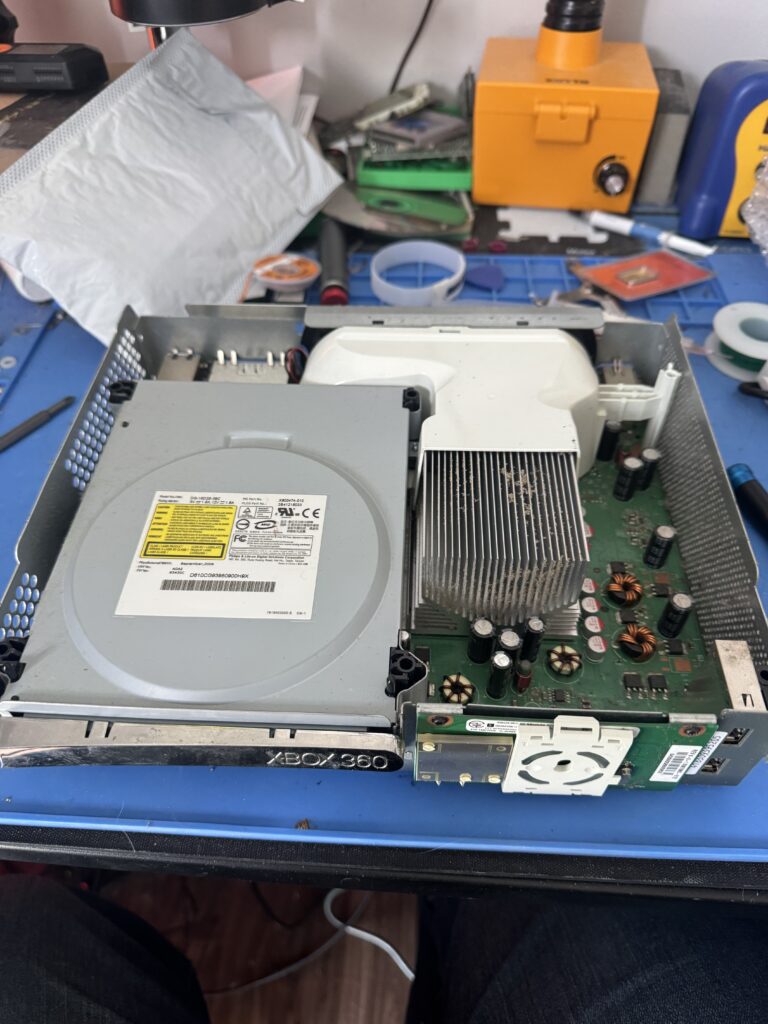
We’ve got to remove the DVD drive and the RF / power board on the front, and then we can get at the logic board itself after we lift it out of the shell. Then the real mad science can begin…
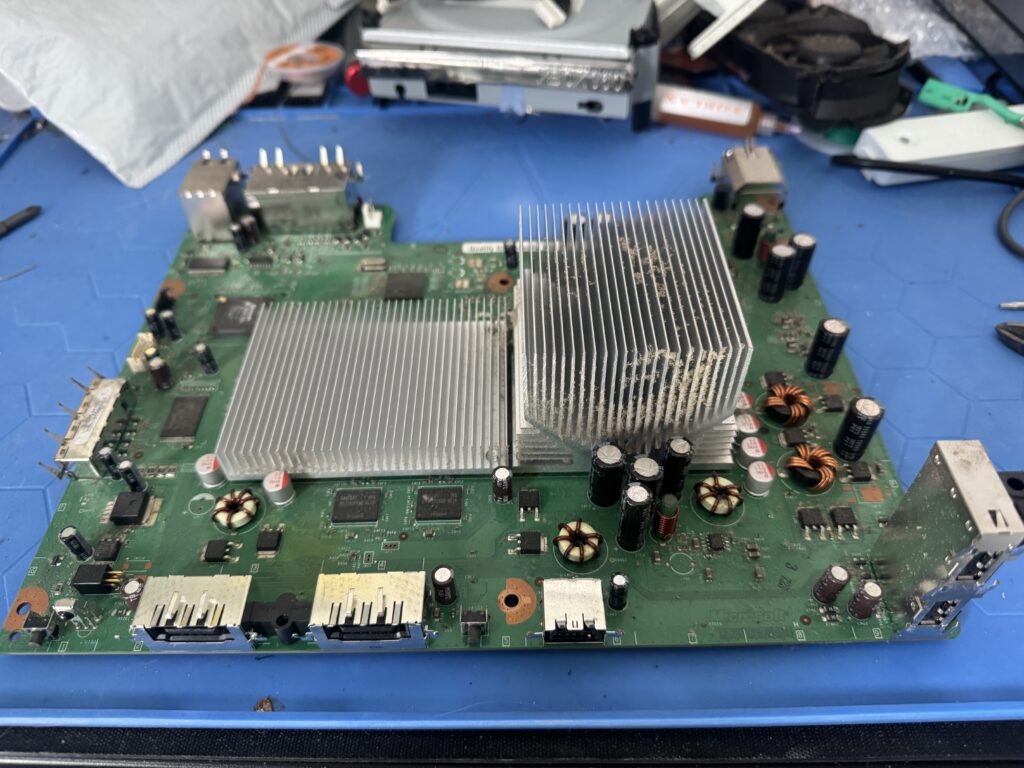
The heatsinks are held on with X-clamps that live on the underside of the board and are really easy to pop off with a flat-head screwdriver. A little gentle wiggling later and off they come.

No caps are blown, there’s only a little dust that can be cleaned easily – this is a good find. I didn’t even have to use my cap replacement kit!
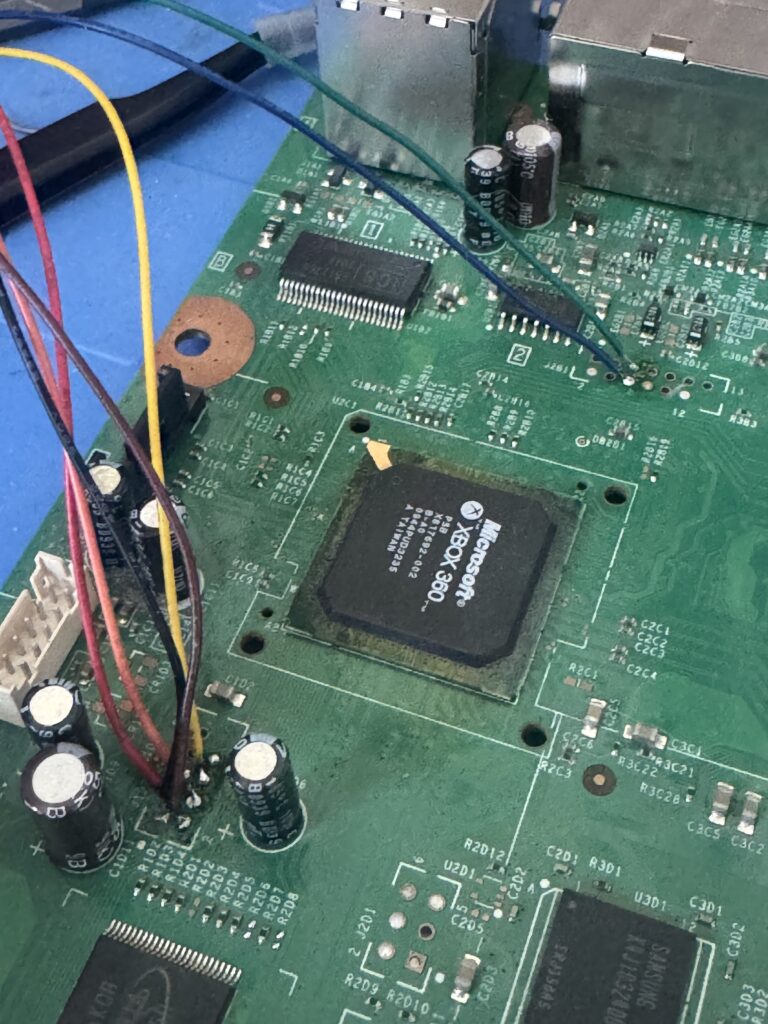
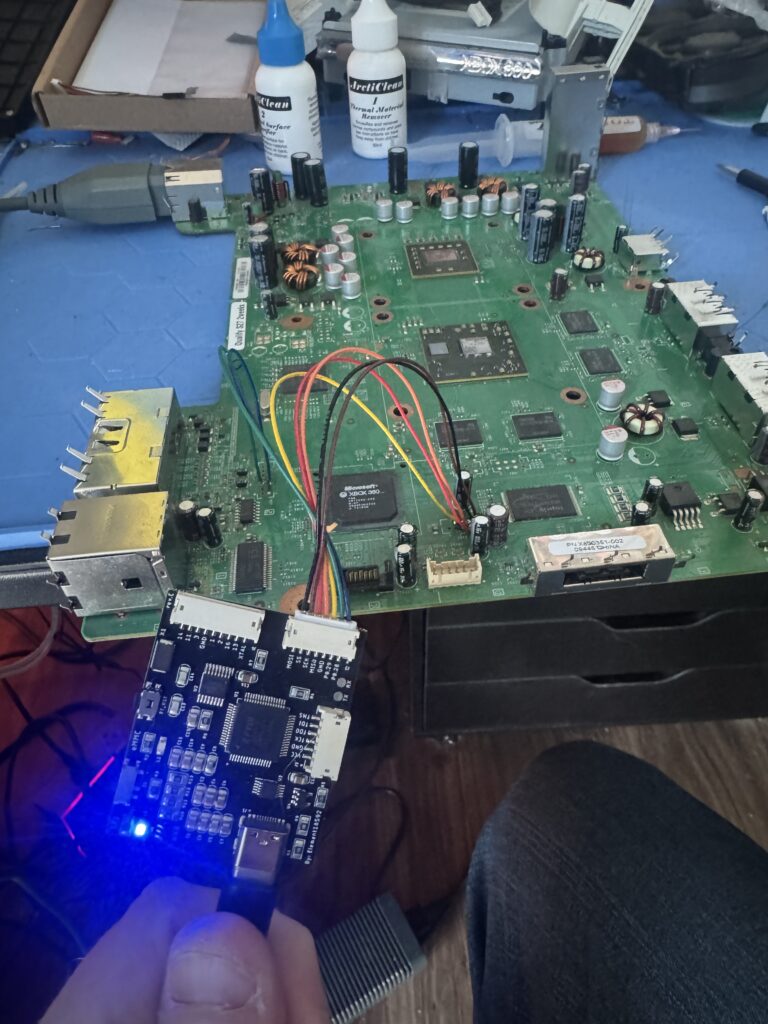
Now that we’ve got the board where we want it, let’s take a sec and find our NAND chip. And what do we have here?

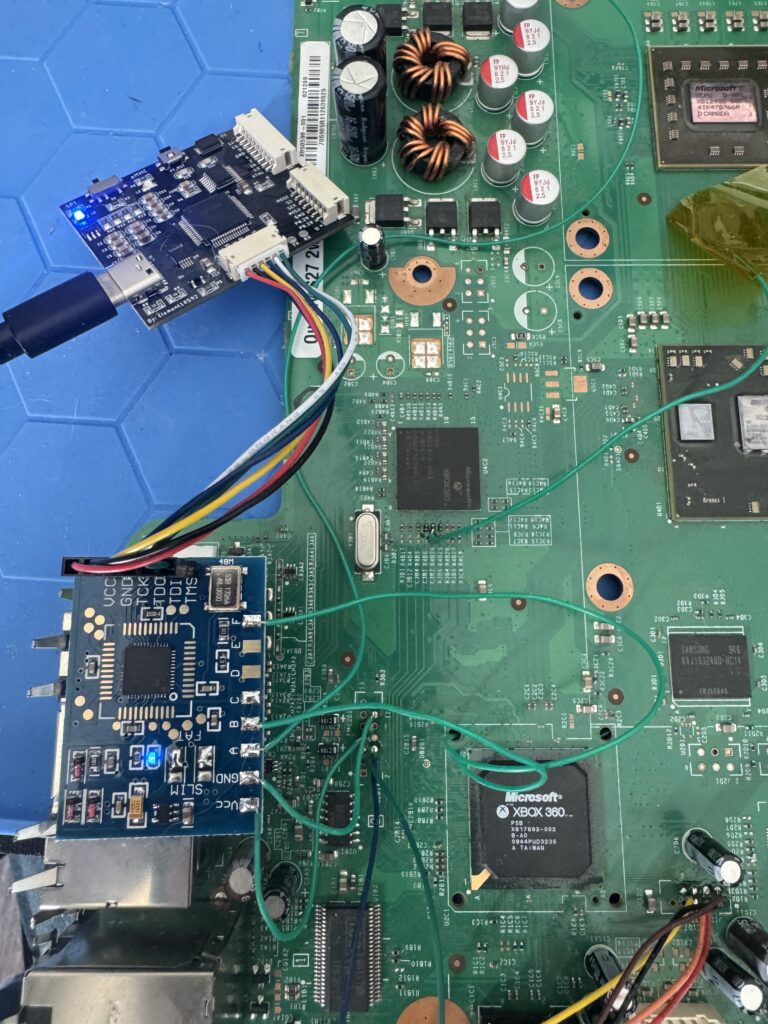
To read the contents we need to wire up some connections on the board. I snagged a USB-C XFlasher 360 for this as it can read NAND and program glitch chips. A Swiss army knife of 360 modding! It comes with the connectors, wires and everything you need to get your NAND data after some quick soldering.
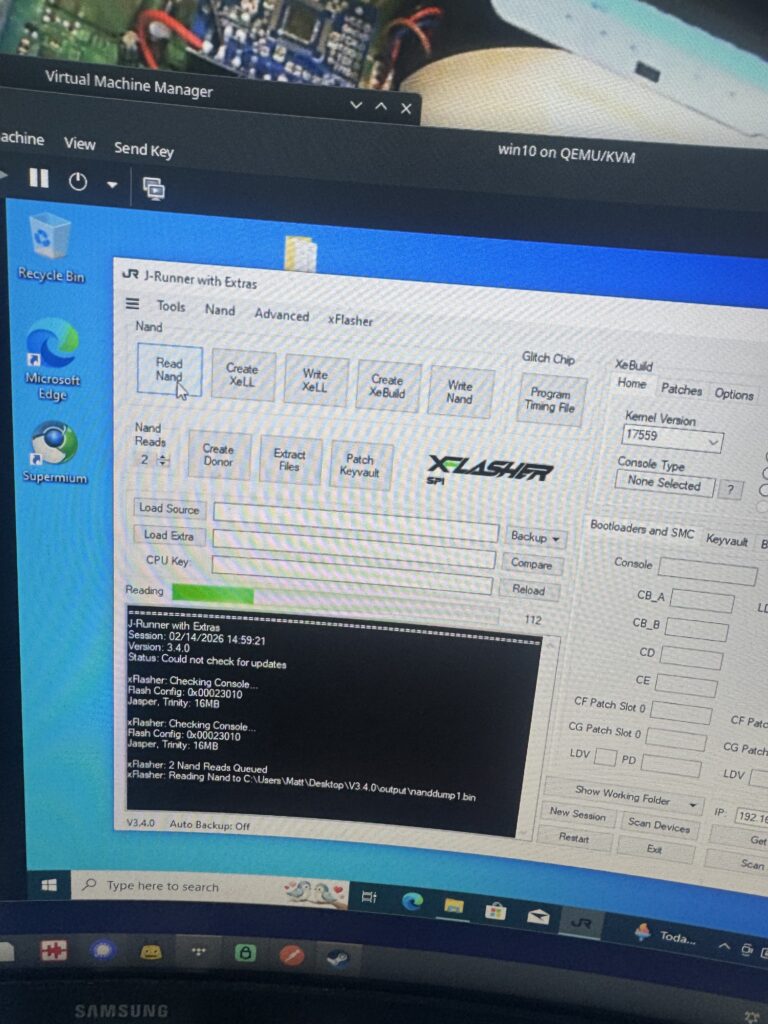
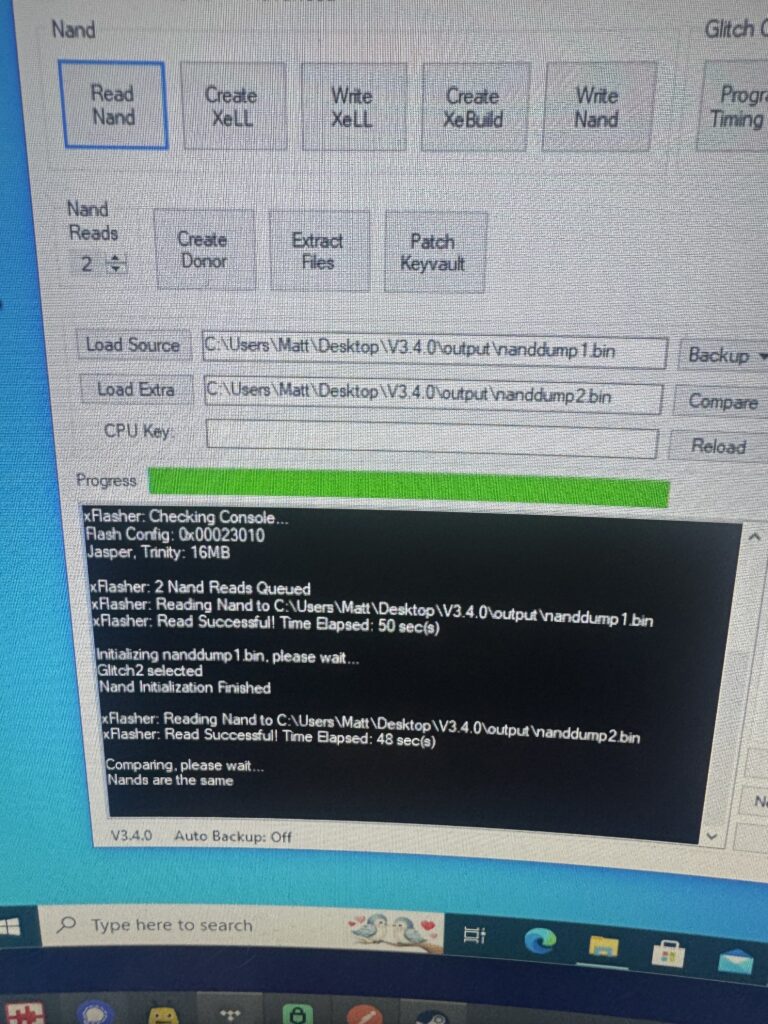
With that all out of the way we can hook up the flasher to a Windows PC and do what we need to do. J-Runner with extras has all the goods you need! Because I’m a turbo-nerd I ditched Windows last year and use CachyOS as my daily driver now, so a Win10 VM was created for this work. Works perfectly with USB passthrough – genuinely impressive!
The XBox board needs standby power. Do NOT turn it on when doing NAND reading and flashing unless you want a fancy doorstop.
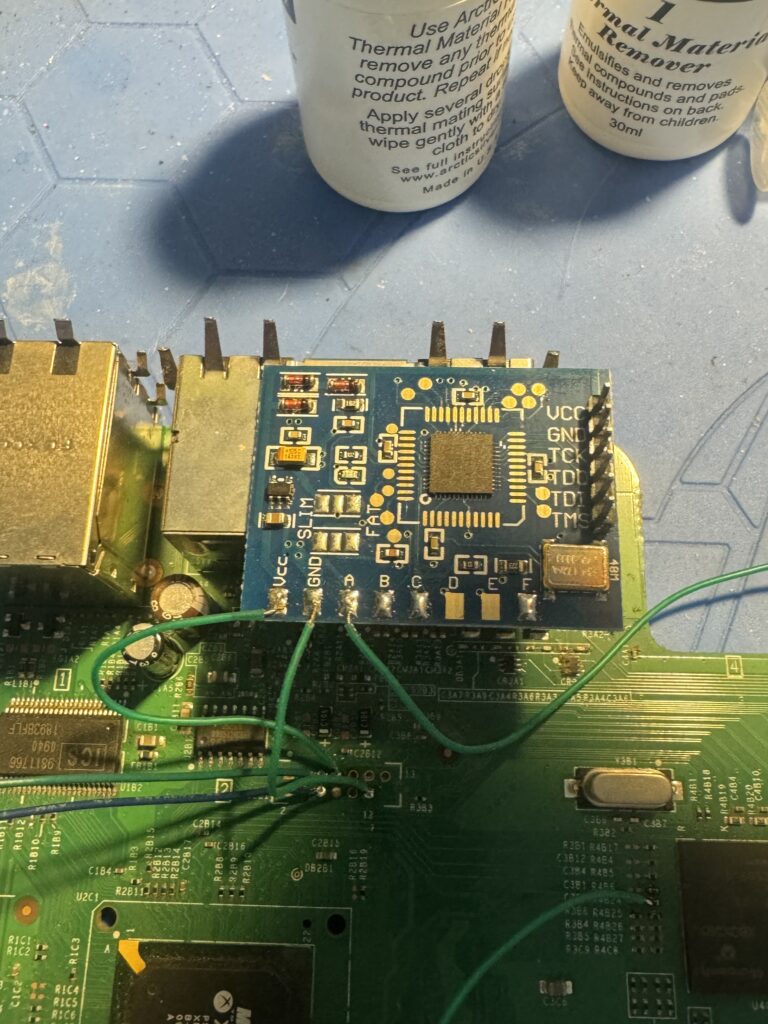
Now that we’ve got the NAND dumps, let’s take a look at our Matrix chip. The technical info on the timing exploits used is pretty mindboggling. After some more reading, we don’t need the onboard crystal oscillator so we can remove the 0 Ohm resistor just above the D and E pads, effectively “converting” it into a v1 chip. Don’t forget to also bridge the SLIM or FAT pads above the ground and A pads in the bottom left depending on what console type is being glitched.
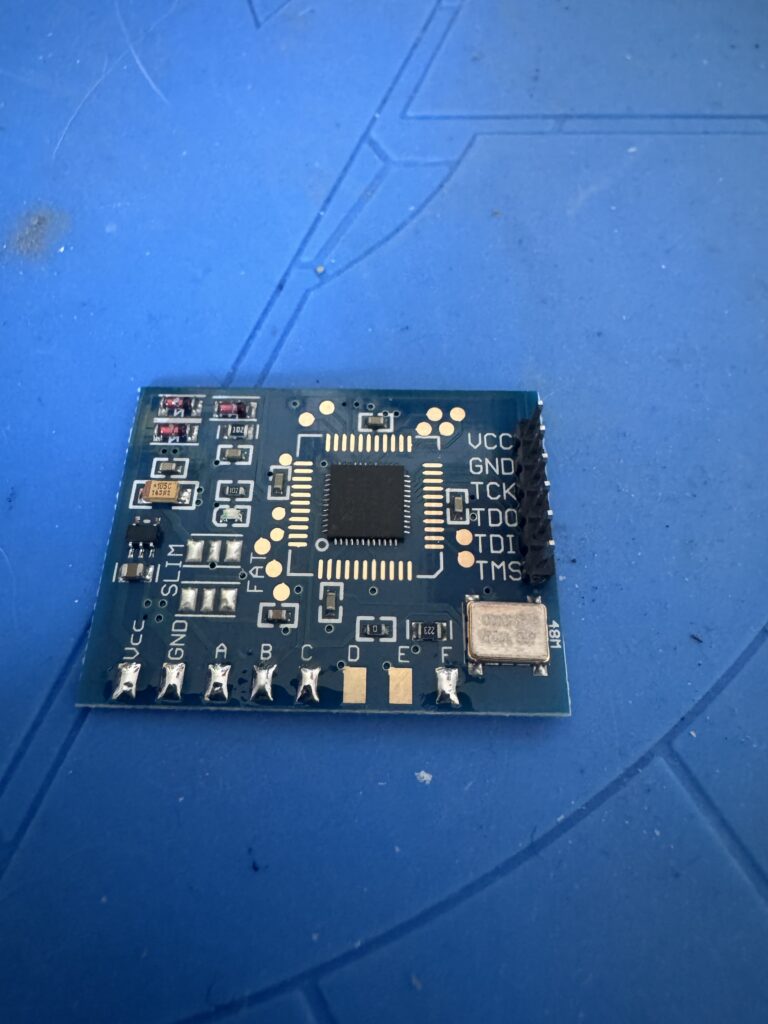
A good place to put this is on the shielding as shown in the photo below. You can also solder the ground to the shielding to make life easier.
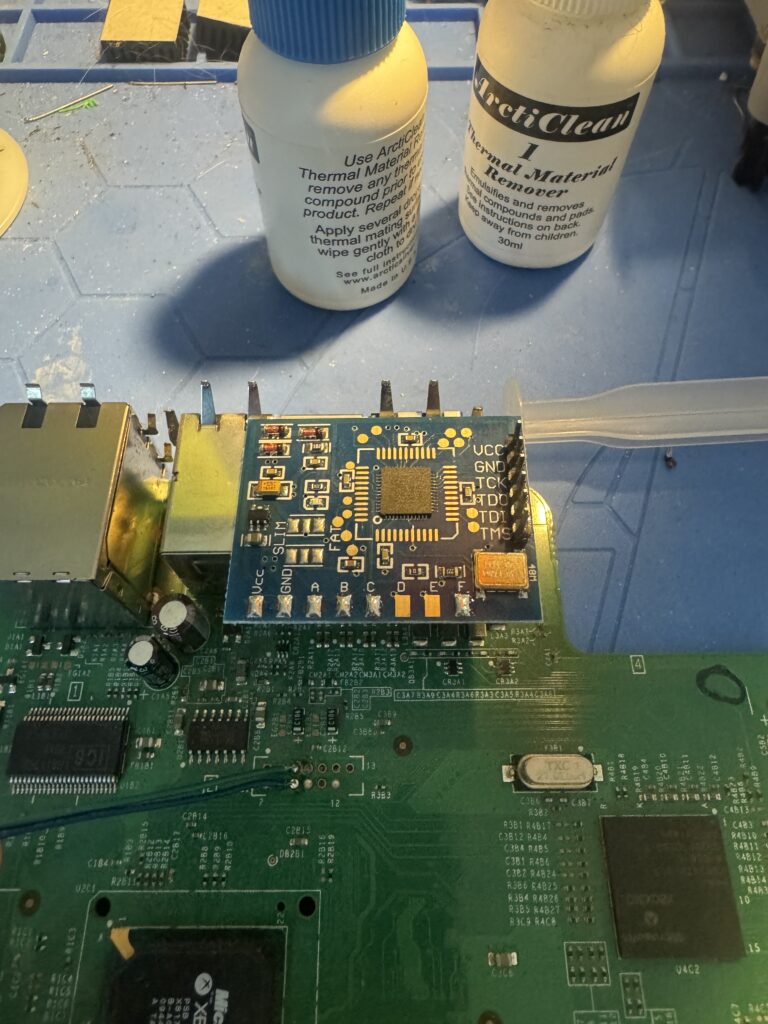
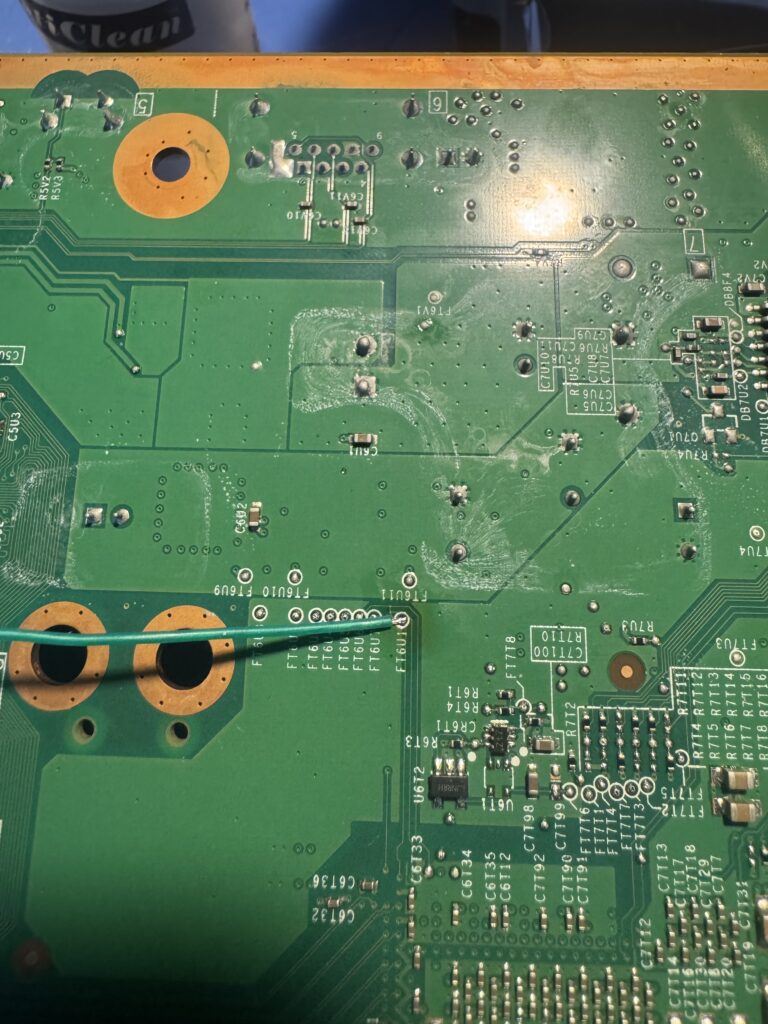
There are some really small solder points that need to be used for this chip and a couple are on the underside of the board. Let’s take a look!
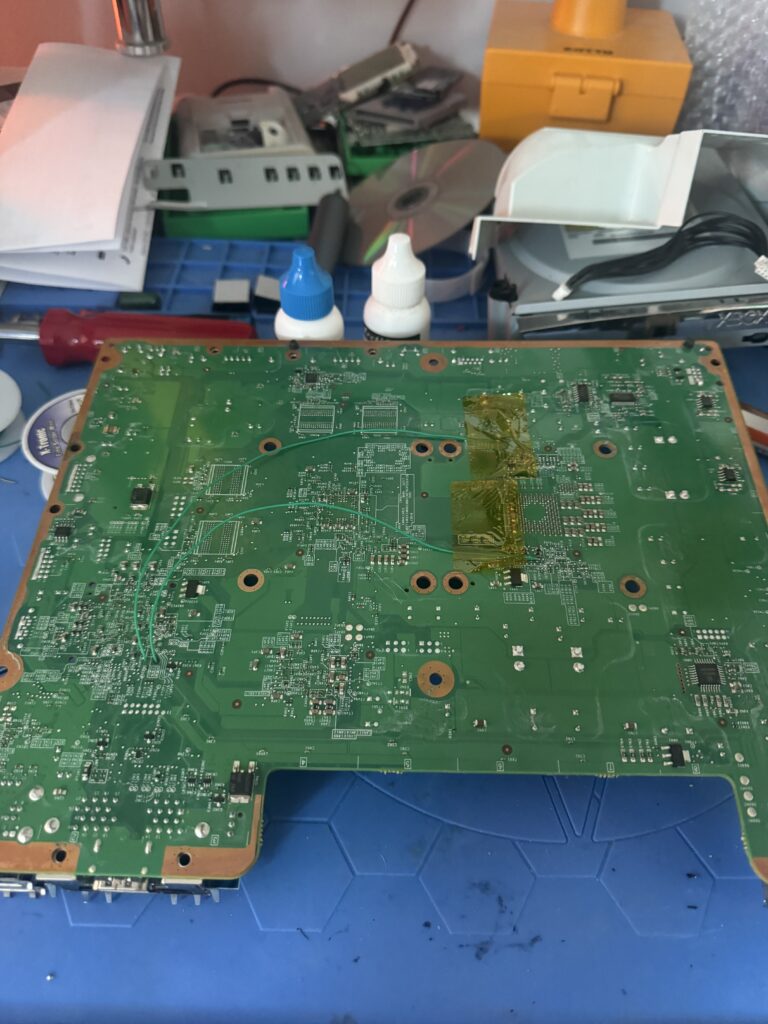
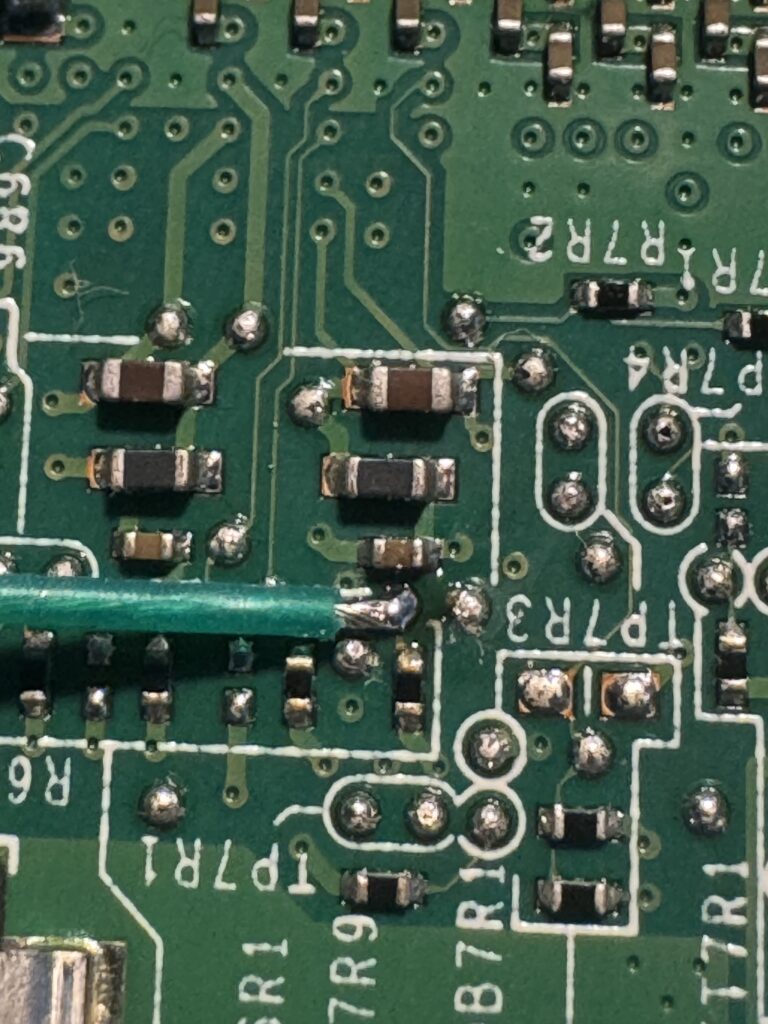
With all the points connected, we can hook the Matrix up to the XFlasher and get the timing files loaded.
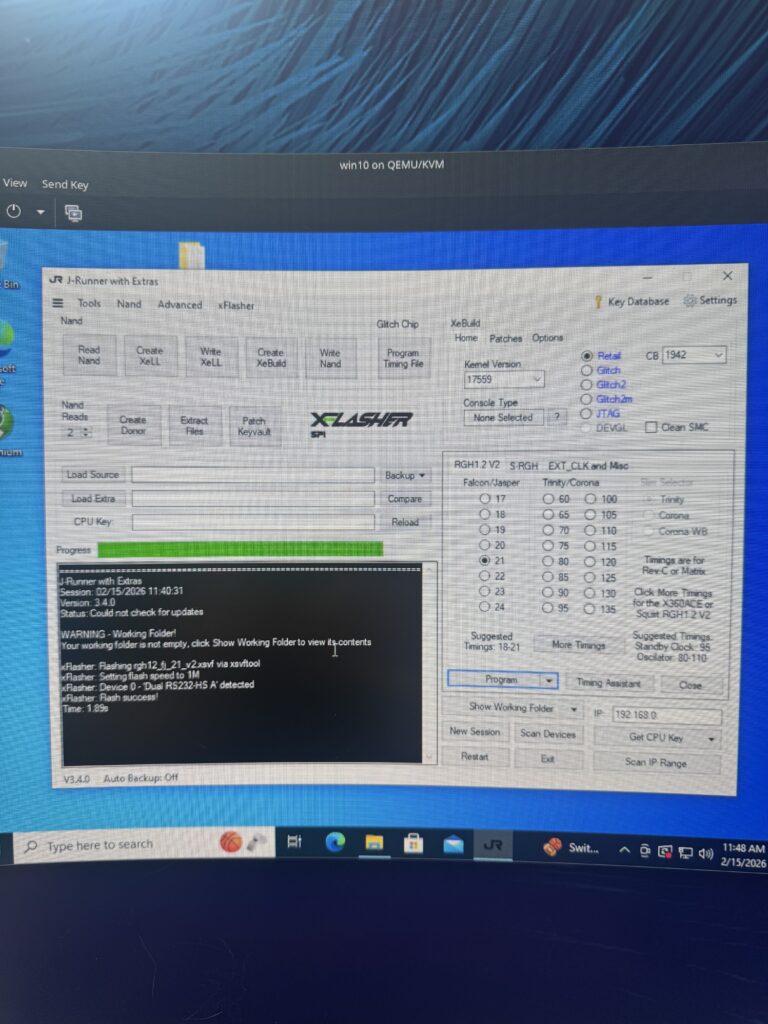
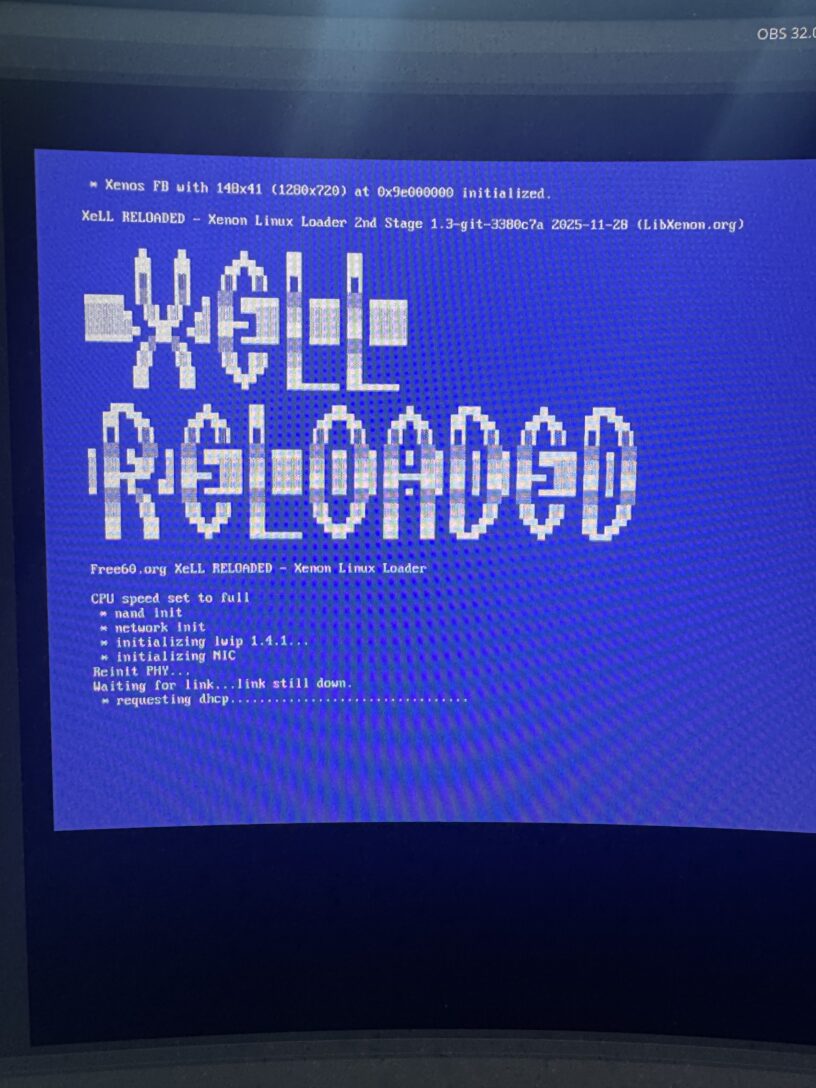
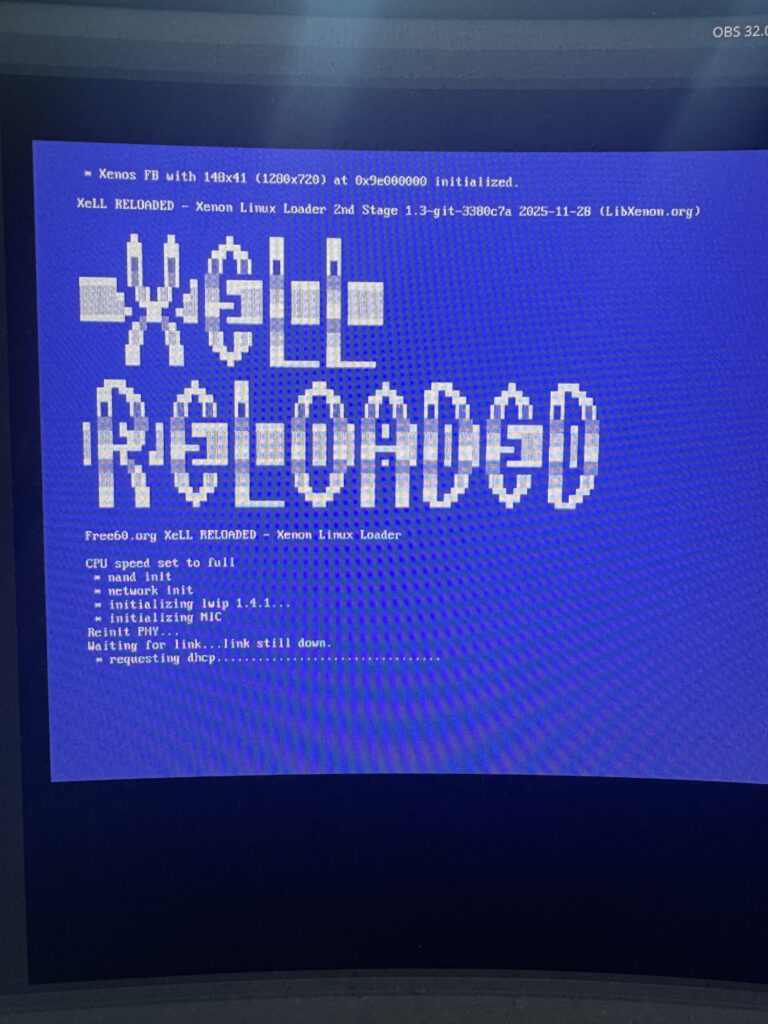
This is most of the hard work out of the way, but there’s still plenty of time to brick the console if you’re not careful! The time has now come to partially flash the NAND so we can boot into Xell and get the CPU key for our custom NAND image.
Now when we turn the console on, we should get some nice debug info from Xell…
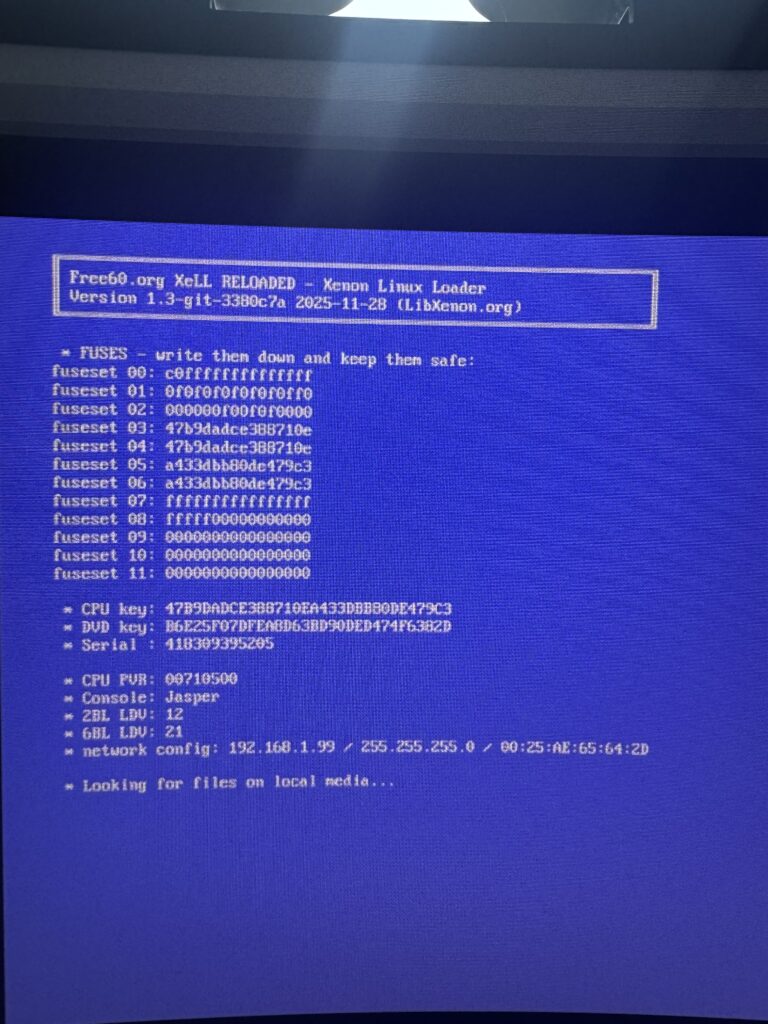
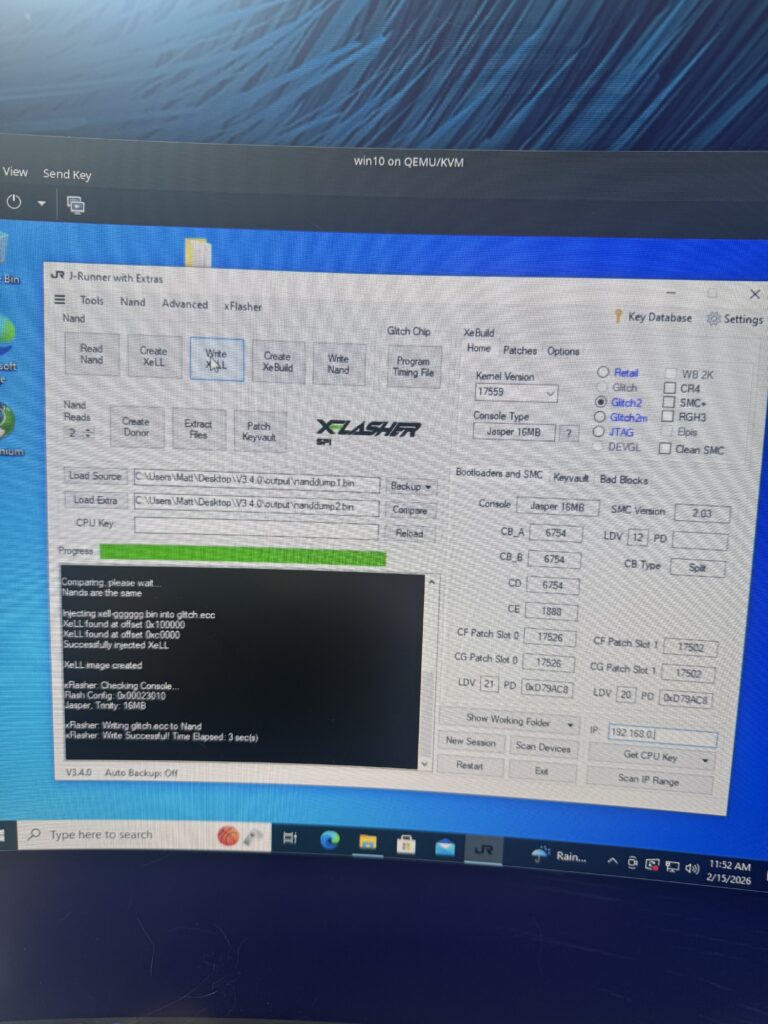
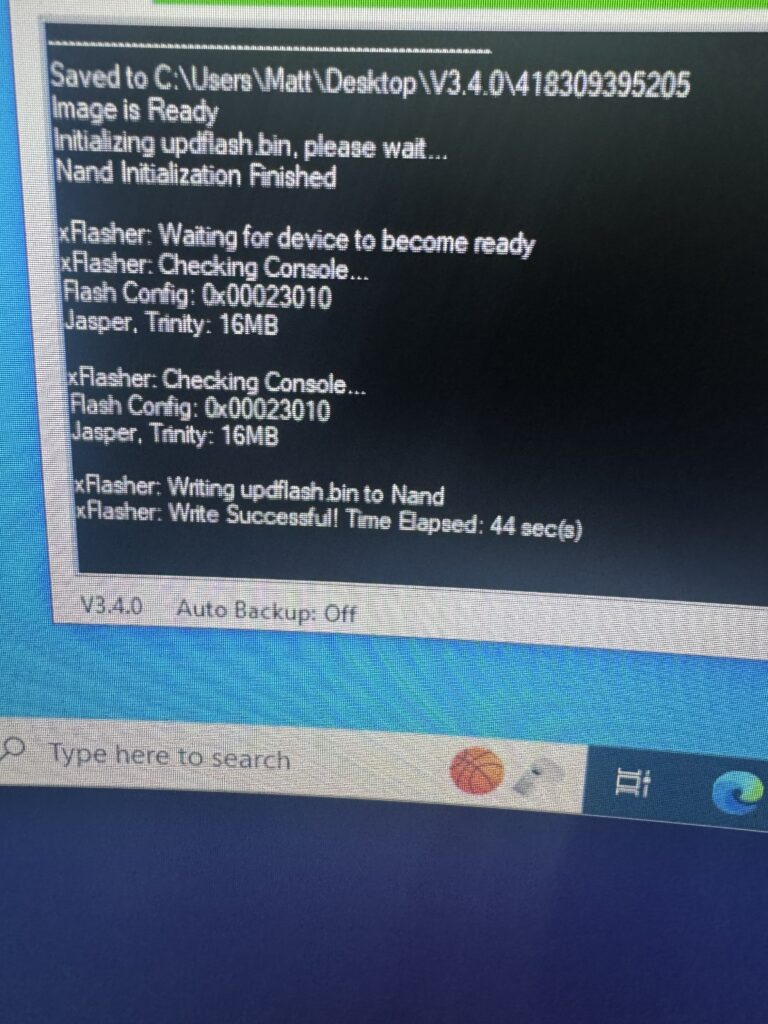
Armed with the key, we can now use J-Runner to create our custom NAND and then flash it to the Hynix chip.
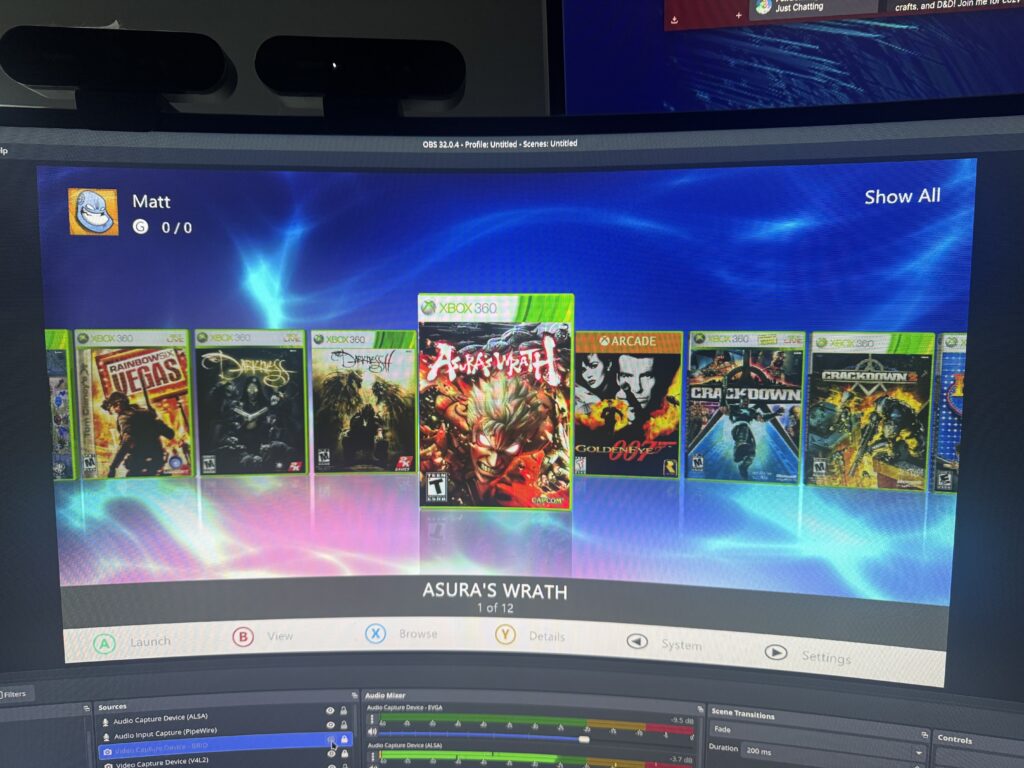
One of the really nice things about doing this mod is that it opens up the way for things like a 2TB SSD with games loaded on it, along with custom dashboards for content navigation (and FTP server functionality for uploading more!)
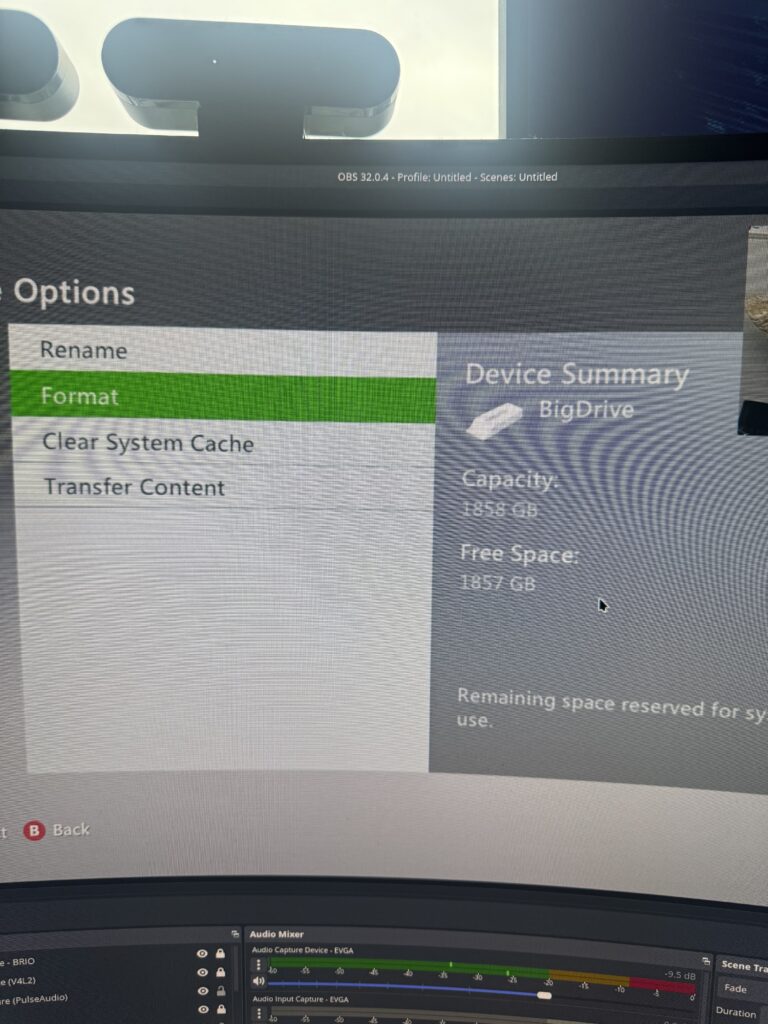
I decided to take advantage of XeXmenu, DashLaunch and Aurora to have a nice shiny custom dashboard where I can pick my games. It really does look fantastic, don’t you think?
All in all I learned a great deal during this process. It’s definitely not for anyone who’s not comfortable with doing Weird Shit, but the result is easily worth it!
Leave a Reply